Showing posts with label lampshade. Show all posts

Saturday, June 07, 2008

craft project disappointment #2

I wish I had better photos to illustrate my point here, but...

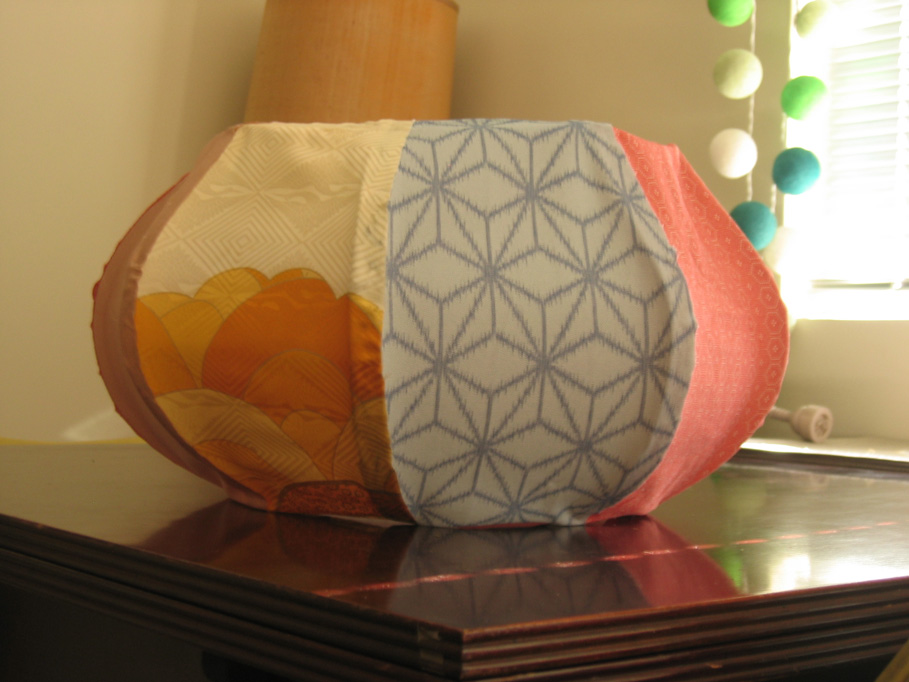
Here is a picture of two table lamps, made from custom frames that I ordered in:


Which one do you think was made from special, expensive, adhesive backed card specifically designed for making lampshades?

Which one was made using plain white polyproylene?


It's hard to see here (taking photos of lighting is haaaard), but the one on the left glows a hideous orange colour, no matter what the fabric or bulb is. The one on the right is perfect. You'd be forgiven for thinking the perfect one was made with the fancy card. But oh no - that would be the ugly orange one.

I think I've had it up to my ears with H***works now. Not only are they badly located and the staff are often rude, but they also sell an expensive and inferior product. I spent $70 on this stuff only to find it was really crap.

Lesson learnt - stick to what you know works well, even if it is a bit more fiddly.

That all said, I'm really happy with how the good one turned out. Exactly how I pictured it in my mind. I'm going to make a few more to sell ... somewhere.

Wednesday, February 13, 2008

lamps and more lamps

So yeah, as I touched on yesterday, I went a little crazy over the weekend making lamps:


They are a bunch of birthday, housewarming and wedding presents that I've been putting off making for ages, for fear (and loathing) of the drive to Handworks in Prahran. It's totally irrational I know. I just dislike the drive along King Street and Kings Way, the parking difficulties and the general vibe of the area. But it's the ONLY place I've found that sell lampshade frames!


Apart from an excuse to showcase my fabric in a self indulgent manner... they're also an opportunity to practice taking nice photos.


I still have a long way to go, but it's a fun way to kill an hour or so.


Of course, if you want to try your hand making your own lampshades (either with a ready made frame or by recovering an old frame) there's this tute that I wrote up awhile ago :)

Friday, September 07, 2007

How to cover a lampshade frame

Finally! I've gotten around to writing up this tutorial on how to cover a lampshade frame! Hope it all makes sense :)

Equipment
- Lampshade frame (these can be tricky to find - I buy mine from Handworks in Prahran, VIC)
- Fabric (anything that can hold it's own when the light is on - you want to be able to still see the pattern!)
- Some sort of base stock to support the fabric - this can be card or flexible polypropylene.
- Spray Adhesive (this will be your best friend throughout the process - don't even bother trying without it)


Process
1) Firstly, cut the base stock to be the same height as your lampshade frame (H), so the top just meets the top horizontal bar and the bottom just meets the bottom horizontal bar. (if your shade is conical you'll have to do that fancy thing where you lie the frame down onto the stock and roll it along, tracing the top and bottom as you go - you'll get a kind of arc shape).

The width of the stock should be enough so that there's about 2.5cm overlap after you've wrapped it around your shade.


2) Lay the base stock down on your fabric. Cut the fabric so that it's about 7mm taller than your base stock at the top and bottom, and a little bit wider (you'll trim this extra width off afterwards).

3) Put your base stock and fabric face down on some newspaper, and spray both completely with spray adhesive (depending on your spray adhesive you might only need to do one or the other, but mine recommends both surfaces). Wait a couple of minutes till the glue gets "tacky" then place the sticky side of your base cloth down centred on the sticky side of your fabric. Note: if you're not confident you can do this accurately, I'd recommend doing step 2 after step 3 :)

4) Trim off the extra fabric width neatly so that the fabric is flush with the base stock. Leave the extra height - you'll need this later!

5) Wrap your fabric & base stock around the frame. Glue the overlap down and wait for this to dry (or just secure it enough so that it doesn't move around).


6) Now for the fun bit - rolling the extra fabric around the top and bottom of the frame. Firstly you need to make this fabric tacky. I use spray adhesive again for this because it's nice and strong yet still "forgiving" in the early stages - ie you can move and restick things if you don't get it perfect the first time. I roll up a piece of scrap paper and place it inside the frame (to protect the inside from glue spray) and then spray around the inside of the fabric where it's sticking out - just the top for now. Wait a couple of minutes till this gets tacky.

7) Working your way around the circumference, carefully roll the fabric around the top horizontal bar and tuck it underneath. (if you've got a particularly thin or thick lampshade frame, you might need more or less than the 7mm extra fabric suggested). Also, depending on how your frame is constructed, you might have to cut slits in the fabric to make space for the vertical supporting rods.


8) repeat steps 6 & 7 for the bottom horizontal bar.

And that's it - you're done!

Wednesday, August 08, 2007

lampy

Some great comments on the 'craftiquette' post - thanks for that! seems like everyone is fairly unanimous on the subject, which was to be expected.

Having a busy busy week tying off loose ends before we jet set off at the end of the week (!), but have squeezed in a bit of lampshade making. i know i promised to make a photo tutorial about how to make these, but I didn't have time to stop and take photos this time. Plus, we're getting a new camera in Japan which should hopefully take MUCH better shots! So next time, I promise :)


A custom lamp order of matching poppies and raindrops fabric :)


an Auntie Cookie fabric lamp for Shannon to take to the market! Her fabric works really well in this context!! And the black on white print provides great contrast when the lamp is on :)


Wednesday, March 28, 2007

In which she learns that taking photos of lighting is rather difficult

Wow it's been quite awhile since my last blog post. Most of my spare energy has been directed towards organising my next print run of fabric, which will hopefully be finished by the end of next week or the week after - my printer is really busy at the moment, which is a shame.

I've also been trying to come up with some new pattern designs but haven't been happy with the result. Maybe I've subconciously moved the bar up too high due to recent successes. I want my next pair of printed fabric designs to be just perfect. The right mix of unique + fun + nature-ee + modern + retro-ee :)

A few people have asked me recently if it's okay for them to use my fabric to make things which they then on-sell. My answer is simple - definately! In my mind that's the ideal use for it. I'd love to see my fabric made into real things that can then be sold on to happy customers. I'd make things with it myself if I had a more reliable sewing machine. That said, the first thing I did when I received my fabric was make it into some lampshades. The yellow works particuarly well as a lampshade because the colour isn't too strong and provides just the right amount of contrast when the lamp is on:


Take care and thanks again for all the support and very lovely comments!

Monday, February 05, 2007

Poor Failed Craft Project

Sitting on the couch yesterday watching the movie Russian Dolls (with all those gorgeous cosy parisian homes) I felt inspired to make something for our apartment. We have those kind of ugly light fittings that sit on the ceiling covered by an oyster shell thingy (oh how i'd love to have hanging lightbulbs that I could put funky lampshades on) so I decided to make a sort of lampshade thing that sits flush on the roof and covers/pretties it up a bit.

I spent about 7 hours working on this project up till 1am, always thinking "once it all comes together it'll hold it's shape better... it'll be okay". Well, the only way you learn these things is to try and fail.

Lesson learnt:
If you want to make a lampshade you need a solid frame that can hold it's own weight. A frame made out of polyprop doesn't cut it. Behold:


Okay it might look _okay_ in these photos but in real life, hanging from my ceiling with the light on it looks like a saggy, unrefined mess. Maybe it's rescuable if I line the inside with some stiff wire? What bugs me most is wasting that kimono fabric - I might have to cut this fella up and rescue the pieces.