
Mat cutting can be a lot of fun. Many of the lovely little prints you get from Etsy etc aren't a standard size, so being able to frame them properly in a shop bought frame is a very handy skill to have!
With the right setup, and familiarity with your tools it can be super easy. I struggled with my first few but once I had a bit of practice it was so easy and so satisfying. I've included some tips here that will help you to avoid the troubles I had!
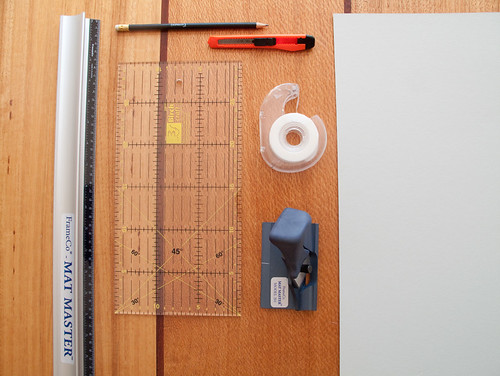
Materials required
You will need:
- A bevel cutter and guide rule. I got this set from Frame Co for $126.50
- Mat board (AKA Mount board) in a colour of your choice. Again I got mine from here.
- Pencil
- Cutting knife
- Flat quilters ruler (optional)
- Sticky tape
- Large sheet of thick cardboard or some spare mat board to use as a "cutting mat" (do NOT try to use a green cutting mat, it's too tough!)

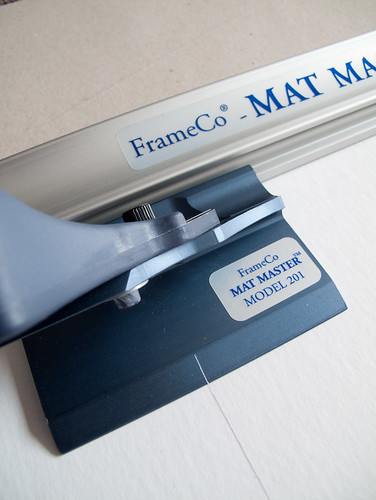
Close up of bevel cutting head - very fun to use
Measuring
Step one: measure your artwork width and height, including the space you want to leave around the artwork. If your artwork has a defined edge you can measure to this point or slightly beyond it to leave a nice white border around your print.
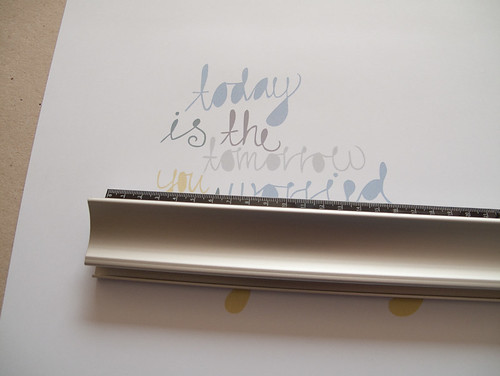
Next, measure how big your mat board needs to be to fit inside your chosen frame. Take a larger sheet of board and trim it down using a plain cutting knife and ruler, making sure it's perfectly square (as in 90 degree corners)!! The quilter's rule can be handy for this.
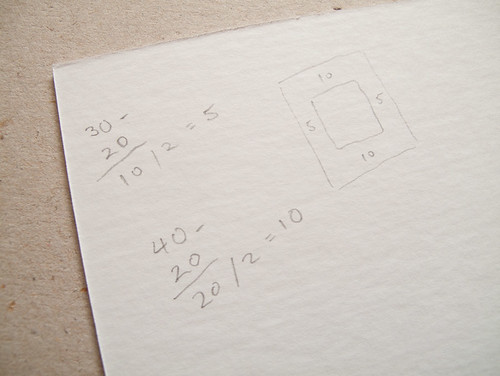
Doin' maths.
On the back of your cut mat board, do some maths to figure out the position of the hole you're going to cut. Eg: (board width - artwork width)/2 = left & right width. Sometimes it can look better to leave an extra 20% at the bottom so it looks more visually balanced. Up to you!

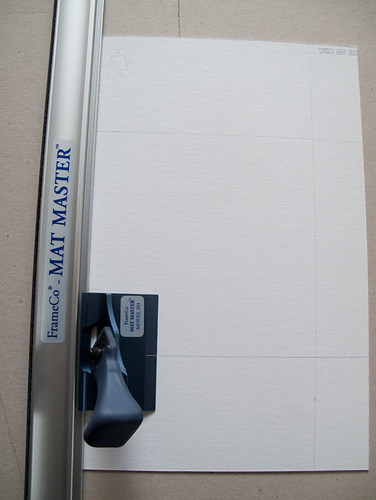
Mark out your lines
Step two: Use your previous calculations to measure and mark where you are going to cut. Draw the lines on the back of the mat board, extending all the way to the edges. Make sure it's all perfectly square! (again quilter's rule can be handy but not essential, you can just do it the old fashioned way).
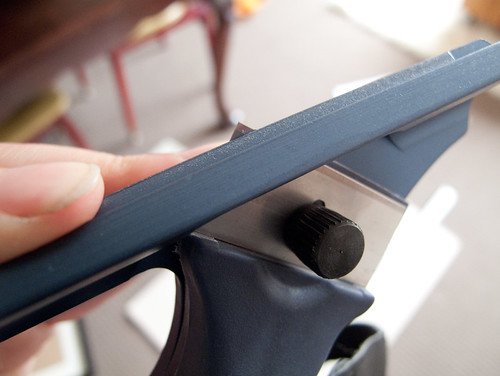
Bevel cutting head - with blade pushed out
Note: Before you start cutting, make sure the depth of your bevel cutting blade is correct. Push the blade out and line it up with a piece of your mat board. It should extend just half a mm beyond the thickness of the board for a clean cut. Too deep and it'll cut too far into your cardboard "cutting mat" and affect the smoothness of your cut. The blade depth is adjustable.
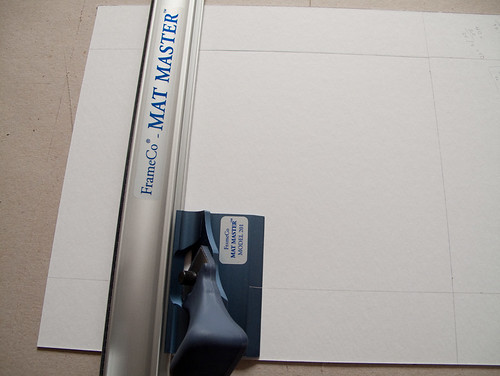
Cutting edge 1
Step 3: It's time to cut! Place your mat board face down on your cardboard "cutting mat". Remember, don't use one of those green cutting mats as they're far too hard and won't let your blade slide easily.
Place the ruler exactly in line with the left hand pencil line. You will be cutting away from yourself. Position the bevel cutter so the little marker is in line with the pencil line closest to you.
Closeup of start position (this isn't a sponsored post by the way! That's just how my tools are branded!)
Push the handle down firmly and slowly cut away from yourself until the marker on your bevel cutter reaches the pencil line at the other end. Precision is very important!! Keep your elbow low to help with the smoothness of your cut.
Cutting edge 2
Rotate your board counter clockwise so you're starting at the line you've already cut. Cut the second edge in the same way. Depending on your equipment, you might find that your first cut is 1mm off the pencil line. Ignore this when positioning your cutter head. Just refer to the pencil lines for start and stop positions. If it's not producing a clean corner then just take note of where you started and stopped and adjust accordingly.
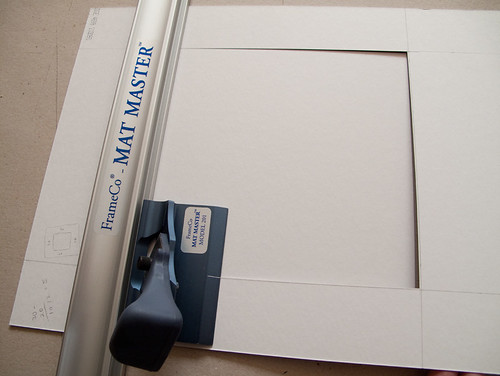
Cutting edge 4
Rotate your mat board counter clockwise again and cut the third edge. Repeat for the fourth edge. In this pic I'm holding the board up slightly just so you can see where I've cut.
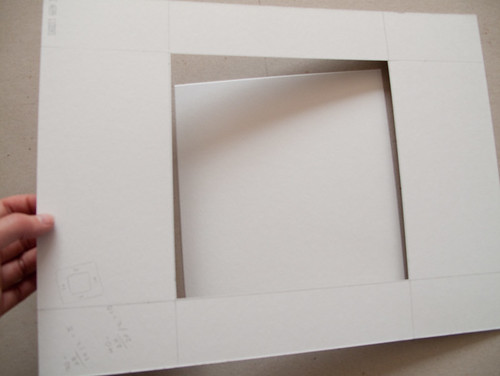
Lift it away!
If you've cut accurately, the outside of the mat board should just lift off leaving the middle behind! If you've got some little tags in the corners holding the middle in place, gently cut them free with a spare blade.
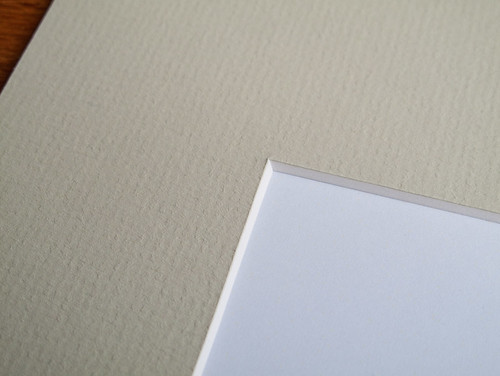
Oooh pretty
Turn the board over and admire your corners! Ooh, pretty. I like how the white core stands out on a coloured mat :)
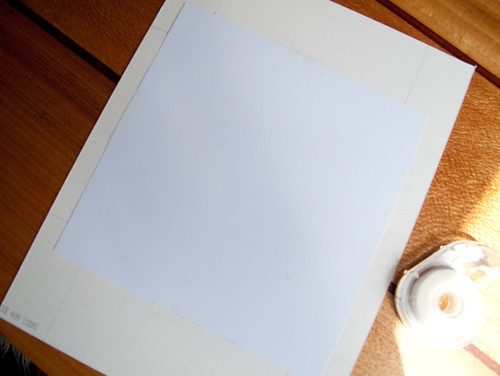
Tape your print down
Carefully position your print in place and tape to the back of your mat.
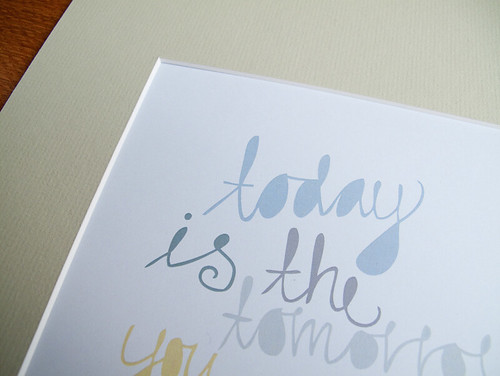
Closeup
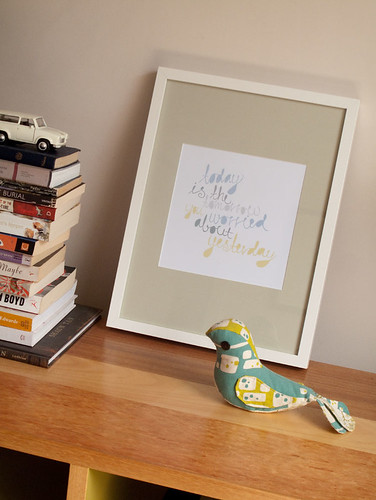
Finished! Today print framed with DIY cut mat board for a ready made frame.
Pop it in your frame, and voila! You're done!
31 comments:
Thank you so much for posting this I have been meaning to buy a mount cutter for ages and have not got around to it. Now I have some proper instructions on how to use it I don't have any excuses!
That's a great tutorial! I didn't realize it was so doable [with lots of practice given my shaky hands!]. Thanks for posting.
You make it look so easy. I've always wanted to have a go at this, and it gives me the confidence to have a go - Thank you x
i love the print. care to share where you got it?
Great tutorial! But please don't use sticky tape on your artwork. Most kinds of sticky tape are very damaging to paper. They will discolour with age, staining the paper and making it brittle. Even 'archival' tape like Filmoplast is not recommended as it is hard to remove. The correct way to mount art work is using methyl cellulose glue or wheat starch paste, as these are reversible. You could also use gummed tape (the tape that you wet slightly). As all these methods use water there is a chance of 'cockling'. To avoid this, let it dry under weight with some felt or cardboard to take up moisture. But be careful not to glue the cardboard to the artwork as well!
Also, it is important to use acid free mat board for the mount and the backing in the frame. Acid mount board will cause staining even when it has a layer of acid free paper on top (the staining will have the exact shape of the window you cut..). Sorry if this sounds too much as critique, I really like your tutorial!
thanks for sharing this.. I too have always looked at the cutters in the craft store but never known which to buy etc....! nice pics! .. brilliant!!
Oh.. when you got to the corners.. do you lift out your cutter..turn the board and re align it? I may have missed this bit..
Another person pitching in framing advice from pro experience....
only attach one edge!! the paper will expand and contract with ambient moisture - if you've taped all four sides then the paper will warp and wrinkle inside the frame.
Thanks everyone!
EXPERTS: I'll take on your feedback and amend the post shortly :)
If anyone's curious where the print is from, I bought it from here:
http://epla.no/products/6161/
Wow those corners are perfect! Love the print too. Your tutorial photos are always great. Nice work!
How do you chickainka's find time do great such wonderful blogs when you are sooo busy printing wonderful fabrics?
Thanks for the Tutorial. We loved reading it. We may even frame a little something and send it to you as a token of appreciation!
Mookah mummy
I can't wait to buy my next print and make my own mat. Thanks so much for this, I'll be linking as well.
I love the tutorial that you have presented. THe decoration in the wall is just wlwgant and so simple. Its so easy to follow. THanks a lot.
Thanks, what a useful tute! ANd I LOVE that bird! Your fabric - did you make it? SO cute!
Great tutorial.Lovely work.
data entry india
Very good tutorial, thank you! And congratulations on your new collection. I love how the lamps look like with your fabric.
very cool. thanks for the demo. and i love the final photo with the finished piece and the very cool cloth bird!! so lovely
That bird is damn cute too. Smiling now. Thanks.
Brilliant !!!
emailed the link to my Girlfriend. She;ll be happy with this ! thx
cotton tapestries
this is nice...if you want to get your website for pictures contact Website design delhi company.
saat forex zayıflama hapları gizli kamera
thanks for this, amazing work.
__________________
Watch The Expendables Online Free
Great tutorial! But please don't use sticky tape on your artwork. Most kinds of sticky tape are very damaging to paper. They will discolour with age, staining the paper and making it brittle. Even 'archival' tape like Filmoplast is not recommended as it is hard to remove. The correct way to mount art work is using methyl cellulose glue or wheat starch paste, as these are reversible. You could also use gummed tape (the tape that you wet slightly). As all these methods use water there is a chance of 'cockling'. To avoid this, let it dry under weight with some felt or cardboard to take up moisture. But be careful not to glue the cardboard to the artwork as well!
__________________
Watch The Expendables Online Free
Watch The Other Guys Online Free
Watch Scott Pilgrim vs. the World Online Free
Watch Salt Online Free
Watch Dinner for Schmucks Online Free
Watch Step Up 3D Online Free
Watch Inception Online Free
I want to thank you for providing this useful information about web services! I have been looking for exactly the same information and your post is really useful for me! I also think that it may be helpful for any custom writing service Cheers!
Term papers within deadlines.
Pretty good post. I just stumbled upon your blog and wanted to say that I have really enjoyed reading your blog posts. Any way I'll be subscribing to your feed and I hope you post again soon.
Term papers within deadlines.
Nice tutorial. Thak you.
Hey great article, great help and pretty well written. You should really check up on getting a custom gateway design for your widgets. It could really push you some extra info....i absolutely love your unique blog, i would be very honored if you would want me to post a bloomy review about this blog, Thank you very much and of course I would like that, feel free.
"Thanks
CPA Network"
Hey great article, great help and pretty well written. You should really check up on getting a custom gateway design for your widgets. It could really push you some extra info....i absolutely love your unique blog, i would be very honored if you would want me to post a bloomy review about this blog, Thank you very much and of course I would like that, feel free.
"Thanks
CPA Advertising"
Post a Comment