Sorry it's taken me so long to finally get around to posting this! Quite a few people expressed interest in a tutorial on my
picture framing post, so here it is!
Mat cutting can be a lot of fun. Many of the lovely little prints you get from Etsy etc aren't a standard size, so being able to frame them properly in a shop bought frame is a very handy skill to have!
With the right setup, and familiarity with your tools it can be super easy. I struggled with my first few but once I had a bit of practice it was so easy and so satisfying. I've included some tips here that will help you to avoid the troubles I had!
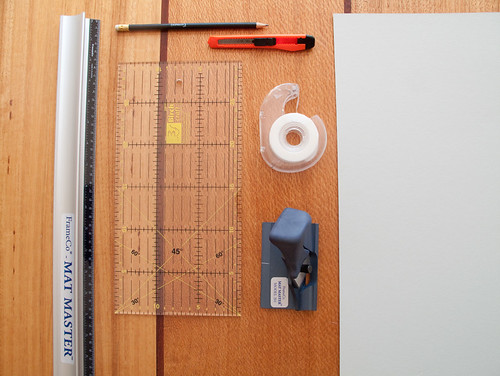 Materials required
You will need:
- A bevel cutter and guide rule. I got
this set from Frame Co for $126.50
- Mat board (AKA Mount board) in a colour of your choice. Again I got mine from
here.
- Pencil
- Cutting knife
- Flat quilters ruler (optional)
- Sticky tape
- Large sheet of thick cardboard or some spare mat board to use as a "cutting mat" (do NOT try to use a green cutting mat, it's too tough!)
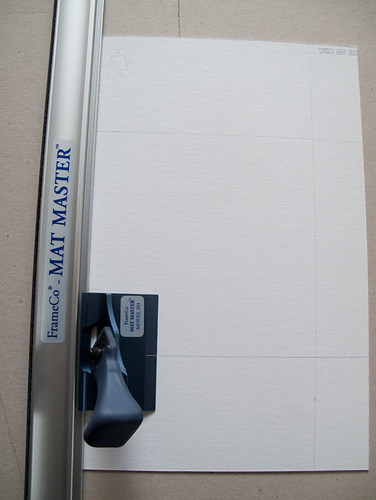
 Close up of bevel cutting head - very fun to use
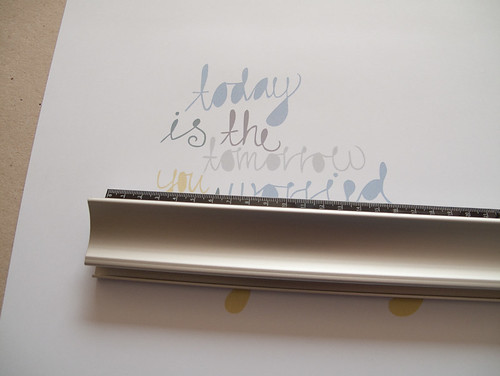 MeasuringStep one:
 measure your artwork width and height, including the space you want to leave around the artwork. If your artwork has a defined edge you can measure to this point or slightly beyond it to leave a nice white border around your print.
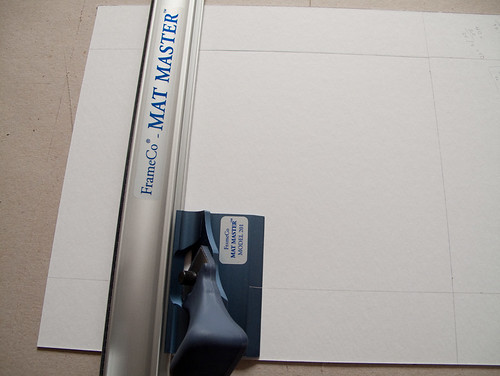
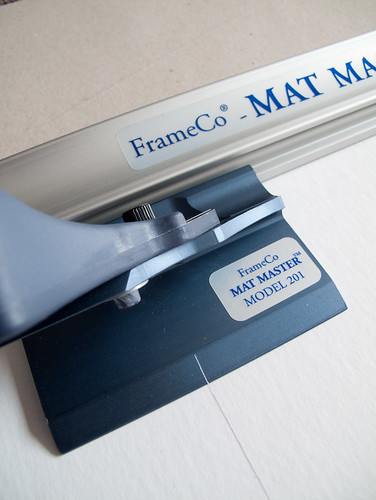
Next, measure how big your mat board needs to be to fit inside your chosen frame. Take a larger sheet of board and trim it down using a plain cutting knife and ruler, making sure it's perfectly square (as in 90 degree corners)!! The quilter's rule can be handy for this.
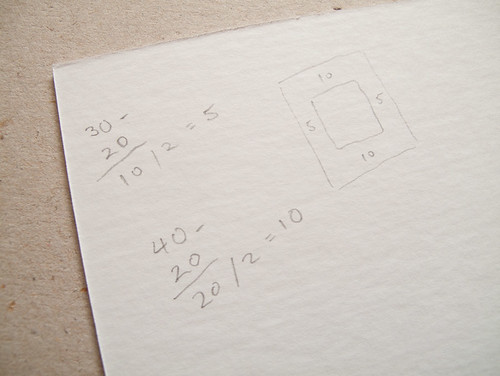 Doin' maths.
On the back of your cut mat board, do some maths to figure out the position of the hole you're going to cut. Eg: (board width - artwork width)/2 = left & right width. Sometimes it can look better to leave an extra 20% at the bottom so it looks more visually balanced. Up to you!
 Mark out your linesStep two:
 Use your previous calculations to measure and mark where you are going to cut. Draw the lines on the
back of the mat board, extending all the way to the edges. Make sure it's all perfectly square! (again quilter's rule can be handy but not essential, you can just do it the old fashioned way).
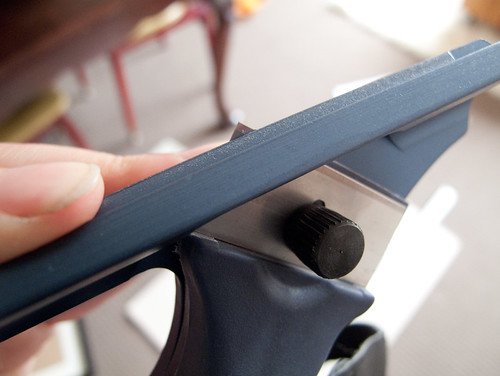 Bevel cutting head - with blade pushed outNote:
 Before you start cutting, make sure the depth of your bevel cutting blade is correct. Push the blade out and line it up with a piece of your mat board. It should extend just half a mm beyond the thickness of the board for a clean cut. Too deep and it'll cut too far into your cardboard "cutting mat" and affect the smoothness of your cut. The blade depth is adjustable.
 Cutting edge 1Step 3:
 It's time to cut! Place your mat board face down on your cardboard "cutting mat". Remember, don't use one of those green cutting mats as they're far too hard and won't let your blade slide easily.
Place the ruler exactly in line with the left hand pencil line. You will be cutting away from yourself. Position the bevel cutter so the little marker is in line with the pencil line closest to you.
 Closeup of start position (this isn't a sponsored post by the way! That's just how my tools are branded!)
Push the handle down firmly and slowly cut away from yourself until the
marker on your bevel cutter reaches the pencil line at the other end. Precision is very important!! Keep your elbow low to help with the smoothness of your cut.
 Cutting edge 2
Rotate your board counter clockwise so you're starting at the line you've already cut. Cut the second edge in the same way. Depending on your equipment, you might find that your first cut is 1mm off the pencil line. Ignore this when positioning your cutter head. Just refer to the pencil lines for start and stop positions. If it's not producing a clean corner then just take note of where you started and stopped and adjust accordingly.
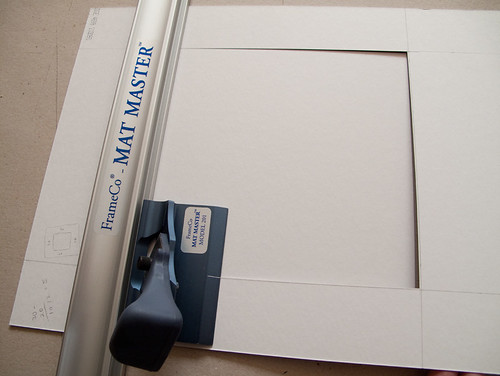 Cutting edge 4
Rotate your mat board counter clockwise again and cut the third edge. Repeat for the fourth edge. In this pic I'm holding the board up slightly just so you can see where I've cut.
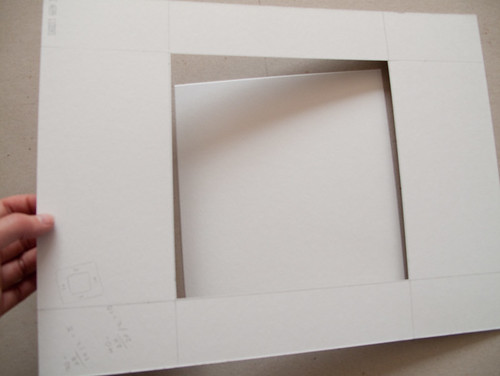 Lift it away!
If you've cut accurately, the outside of the mat board should just lift off leaving the middle behind! If you've got some little tags in the corners holding the middle in place, gently cut them free with a spare blade.
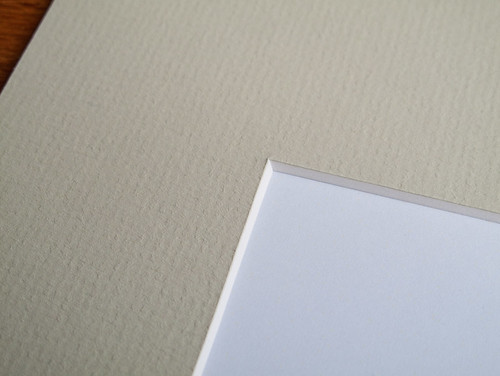 Oooh pretty
Turn the board over and admire your corners! Ooh, pretty. I like how the white core stands out on a coloured mat :)
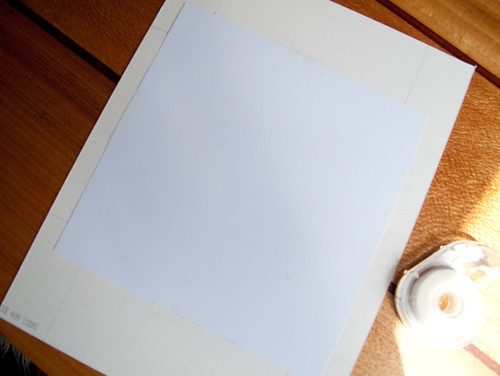 Tape your print down
Carefully position your print in place and tape to the back of your mat.
 Closeup
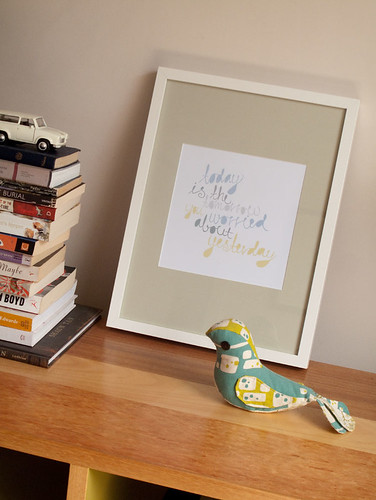 Finished! Today print framed with DIY cut mat board for a ready made frame.
Pop it in your frame, and voila! You're done!