Thursday, December 31, 2009

Market Trolley - refashioned

crafting up my market trolley
Market Trolley - refashioned :)

I love how the Christmas holidays finally give me a chance to be creative-for-the-sake-of-it, to do non-work-related crafty stuff. The reality of running Ink & Spindle is that there's not really a lot of creative work in my day to day. It's a lot of admin and management and strategic stuff, with a splash of creativity here and there.

I was actually quite worried about how I'd spend the two weeks break being freshly single and living alone, but have successfully managed to fill the time with friends and family and bike riding and making, with not too many miserable moments.

So anyway, one of the projects that I invented to keep myself busy was crafting up this market trolley! I've seen these trolleys becoming more and more common around town, and ended up finding a black one which I thought was a bit plain and boring. So I decided to crafthance it :)

I took photos to document the process if you want to have a go:

market trolley ready to be enhanced!
Getting started

-Plain market trolley ($15 at Big W or $20 at Safewa- i mean Woolworths)
-Thick red thread of any variety (I used crotchet cotton)
-Design sketched in sketchbook
-Tailor's chalk or anything else that's removable

crafting up my market trolley
Chalk outline of my design and the beginning stitches

I started by sketching some design ideas in my sketchbook and then transferring them onto the bag with tailor's chalk. The chalk comes off really easily though which is good for fixing mistakes in your drawing but it also rubs off as you work. I just went over my lines as they started to fade.

crafting up my market trolley
Stitching away...

I found a nice large needle and started to topstitch the design. The waterproof fabric of the bag is quite thick though so it can be hard to get the needle through and it made my thumbs sore. I just persisted and spaced the work out over a couple of days.

crafting up my market trolley
Almost finished!

crafting up my market trolley
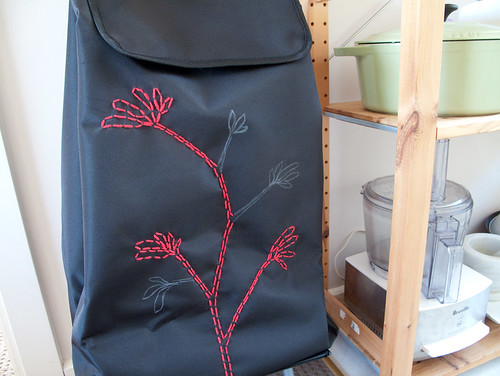
Et Voila! Market Trolley with Kangaroo Paw design

Monday, December 28, 2009

I ♥ Melbourne

melbourne vintage teatowel tote
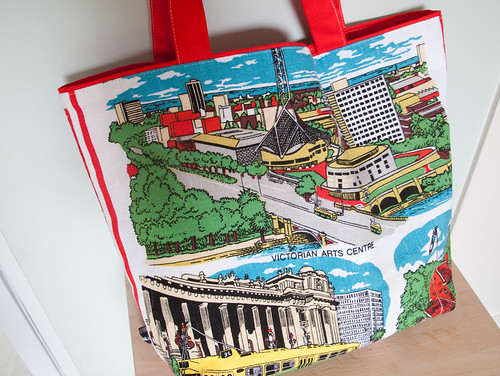
Melbourne 'tea bag' by Reaburn Design (Westgate Bridge!? Oh yeah THERE's a landmark...)

I'm sure you all know how much of a devoted fan I am of my hometown. So when Glenda from Reaburn Design came by our studio with some lovely totes that she'd been making from vintage teatowels, I laid claim to the Melbourne one straight away!

melbourne vintage teatowel tote
Melbourne 'tea bag' by Reaburn Design

melbourne vintage teatowel tote
Melbourne 'tea bag' by Reaburn Design - back

Reaburn doesn't have a website yet, but she does have a pop-up shop appearing in Kensington as of 2nd January I think! I'll blog about that properly when I have her flyer in front of me :)

Oh and whilst we're in the kitchen, I couldn't resist taking a photo of one of my favourite things - my Measuring Ducks!!

measuring ducks

I bought these measuring ducks in an arcade in Kyoto - for only 350 yen! I so so so wish I'd bought more sets. I can't find them again anywhere. They're actually just modern reproductions of an original antique item, which I know some people are lucky enough to have as a hand-me-down.

Hope you're all having a great xmas break. Mine is going far too quickly...

Friday, December 25, 2009

Merry Christmas everyone!!

Merry Christmas to all my very lovely and supportive blog readers!

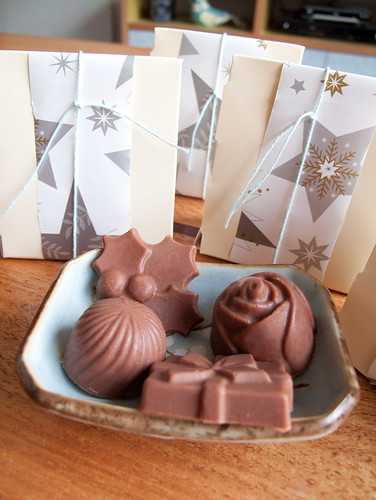
Here's a snapshot of my Christmas in pictures, mostly involving chocolate making & baking...

my little christmas tree
A little festive corner in my flat

a trip to Cake Deco
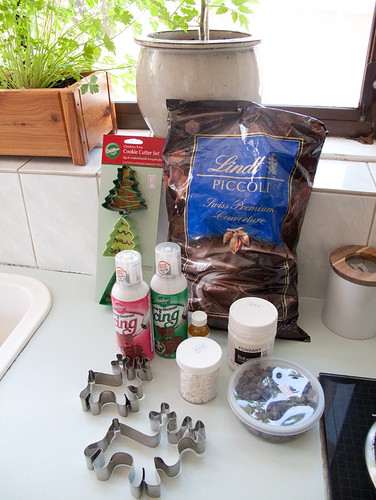
A trip to Cake Deco in the city yielded 2.5kg of Lindt Couverture and gingerbread making supplies. I had to exercise a LOT of restraint in that shop

making chocolates
Melting & tempering the Couverture

making chocolates
Filling the moulds - I made orange, peppermint and strawberry fondant (see that bench space? That's the ENTIRE bench space of my tiny kitchen)

making chocolates
Mmmmm choc-orange-alicious

my handmade chocolates
Finished chocolates and all packaged up!

And on Wednesday I drove to Geelong to visit a friend and we made Gingerbread! I love Gingerbread, and next year I'm going to use a traditional German Lebkuchen recipe that I also found. But these were good for decorating (and nice and dark and spicey and full of molasses - mmmmm)

lebkuchen!
Christmas Gingerbread (how cool are those icing sugar snowflakes from Cake Deco!?)

Have a lovely xmas day everyone :)

Saturday, December 19, 2009

Ink & Spindle Open Studio TODAY!

I'm leaving things to the last minute as usual, but we're having an open studio today (Saturday 19th) from 10am - 1pm! More details over here!

We're a quick train trip from the city if you're heading in already. Here's us on a map. We'll have lots of gifty stuff available like fabric packs and kits :)

Open studio poster
artwork by Sixto from Too Yeah Media.

The illustration above is actually my desk area at the studio! Very cool. Thanks again Sixto for donating the awesome artwork :)

Hope to see you there!

Saturday, December 05, 2009

Melbourne Design Market ... take four

When I really stop and reflect for a moment, I still get the giggles to think that we're a part of the Melbourne Design Market. This is the fourth time I've been there (3rd with I&S) and I don't take it for granted one bit. Getting in to this market is tough, and it's always a spectacular day. And freaking exhausting!

Bianca, Teegs and I have been busy preparing for weeks, but I wouldn't be sitting on my couch here the night before if it wasn't for Theresa our latest intern from 'Noo Zulland' and all her help.

And I managed to get my lamp making mojo back on and made these for the market:

my name is ... lamp shady
Lamps for the Melbourne Design Market

Anyway, hope to see you there! Here's the details:

Melbourne Design Market
Sunday 6th December
Fed Square Carpark, 10am -5pm

Lara xx.

P.S. - thanks everyone for your very lovely comments on my last couple of posts. Your positive and supportive words really mean a lot.

Tuesday, December 01, 2009

Hello Flemington my new friend

my new flat - living area
My new flat - living area with nice big north facing window

So, it's still a work in progress, but I thought it was time to show you some pictures of my new flat. Right now it very much feels like my safe place, where I can be myself, do whatever I like. I feel very fortunate to have such a space. That said it's been a hard, hard few weeks so far... and I hover between not wanting to be sociable at all and knowing that getting out and about is probably good for me.

my new flat - lounge & bedroom
My new flat - bedroom & trainscroll finally up on the wall :)

my new flat - living area
My new flat - trying to fill up the walls

I spent about half a minute looking at this place before handing in my application form. I didn't spend any time looking at the bathroom or kitchen or bedrooms properly, I just knew straight away that it felt right. With loads of natural light and windows facing almost all directions I was taken by it immediately.

my new flat - sun filled kitchen
The kitchen & still messy spare bedroom - full of sunlight :)

The kitchen - albeit tiny - is a robin's egg/mint kind of colour. Win! And even tho it has hardly any cupboard space I don't mind that open shelving, it's kind of cute.

my new flat - and new couch!
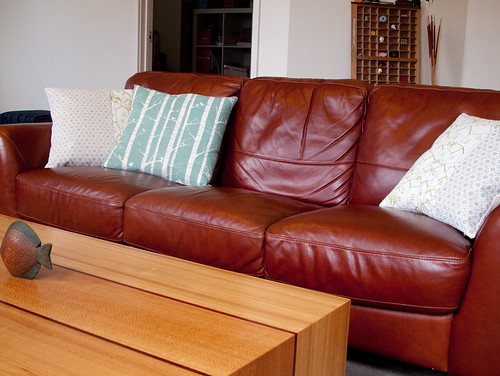
My new couchy friend, some familiar looking cushions and my Kirin (giraffe) collection.

So yeah. That's where I'm at so far. Emotionally bleh, but trying to stay positive. And at least this new home helps cheer me up a bit.

xx

Monday, November 23, 2009

Of changes and growth...

So... if you happen to have been paying attention, you might have clued on that my 'weird life stuff' has involved a change of location. Yup, I've moved house, and now I'm living in a flat of my own in Flemington. It's been a difficult time... but I'm optimistic for the future.

It's definitely been good distraction going through the whole 'settling in' phase and setting up my new place. I'm feeling super lucky to have found myself a cute little flat with lots of natural light, and have kept myself busy making it into the home I've always wanted. I've never lived on my own before, so there's all those things I've always dreamt about doing that I can finally do. Needless to say the place looks pretty girly :)

I'll take some more pictures soon once I've done a bit more decorating, but meanwhile I'll show you some pics of my new windowsill garden!

window boxes in my kitchen
Little herby seedlings growing on my windowsill (yes that is rain! OMG)

I got super excited last weekend when I stumbled across Box My Garden at the Flemington market last weekend. Ray and Marge are the very lovely owners and their speciality is garden boxes of all sizes which they make themselves in Geelong! I fell in love with their little window box sized ones and promtly ordered two. They are gorgeous!

window boxes
Australian Cypress window box by Box My Garden - oregano and rosemary (will they fight?)

window boxes
Australian Cypress window box by Box My Garden - mmmm parsley

And I couldn't write a post about plants without mentioning the little tomato plant that Lou dug up from her garden! She said she has seedlings popping up all over the place so Teegs, Bee and I each got a tomato plant (mystery variety) and some basil. Thanks Lou!

little tomato plant from Lou
Little mystery tomato plant from Lou

a home for pegs

Thanks to one of our Little Basket Kits and a Sunday crafty catchup at our downstairs neighbours' studio, I now have a place to keep my pegs (exciting, I know). I figured there was only so long that I could get away with 'borrowing' my neighbours pegs before I had to buy my own.

It looks tres cute:

peg basket
Peg basket using Bianca's basket kit (which we sell at markets and are too lazy to list in our online shop - but maybe soon!)

peg basket
Peg basket with rooftops print (again, I know...)

Fun. Hometime!

Sunday, November 22, 2009

In Good Company

Hello! I'm a bit belated in writing about this but last weekend a great little article appeared in The Age M Magazine about local handcrafted goodness. My Rooftops print was featured amongst a whole bunch of other amazing things by talented peeps like friends & neighbours Aunty Cookie and Volker Haug. Good company indeed!

M Magazine article
The Age M Magazine

M Magazine article
The Age M Magazine featuring red Rooftops fabric - yay!

Tuesday, November 17, 2009

Wendy June

I'm back - kinda. Still in the midst of weird life stuff, more on that later when I have the head space.

Meanwhile I love how the small worldiness of Melbourne brings together people I know from all sorts of places. I first met Wendy June back in the day when I was working with her hubby - I was freelancing at a web/graphic designer at the time and Andrew said something like "my wife is into crafty stuff, she has a stall at Rose Street". And so I met Wendy June.

It's many years on now and I'm super excited that Wendy is now collaborating with another of my favourite peeps, the lovely Matt of Mattt bags!

wendy june eyes of flame

The exhibition opening night is THIS THURSDAY, at Matt's awesome shop, and you should definitely come along!

Oh, and how awesome is this new product that Wendy's just launched! Little haunted houses as wall art. They're rad. I love houses! Maybe Wendy and I can do a trade ;)

wendy june wall art
"The houses are inspired by the streets of North Fitzroy, and cut into woods that come from wendy june's childhood.

Available in two Tasmanian woods: Birds Eye Huon Pine and Myrtle. Dimensions: Tallest house is 95 x 150mm. Retailing at $179."

Email Wendy for more info!

:)

Friday, November 06, 2009

Ummm, has it really been a whole month?

Wow. I can't believe it's really been a month since I lasted posted. A month! I do have some good excuses including general work craziness and a hefty dose of big life changes, which aren't over yet and there's plenty more developments to come.

So yet again I'm super glad that there's crafty peeps like you out there making gorgeous things that I can blog about in lieu of my own crafty workings. Like this gorgeous Organic Blanket by GreenThreadShop on etsy (thanks to Steph for the heads up!):

little forest organic blanket by GreenThreadShop
Little Forest Organic Blanket by GreenThreadShop

little forest organic blanket by GreenThreadShop
Little Forest Organic Blanket by GreenThreadShop

In other news, there's some new designs & colourways in the shop!

Chalk in Snow on Natural
Chalk in snow on Natural

Birch in Robins Egg on Natural
Birch in Robins Egg on Natural (mmm nice new basecloth for this)

Yay :)

Wednesday, October 07, 2009

How to sew a cushion cover with an invisible zip - A Tutorial!!

finished cushions
Cushion covers with invisible zips - let me show you how!

It has been a very, very VERY long time since I've posted a tutorial on this here blog. Truth be told it's been a long time since I've learnt how to do any new and exciting things, until last weekend when Pete's mum showed me how she made cushions with invisible zips!

They look great, but the thing that excited me most was that it was EASY. Like 10 gazillion times less fuss and hassle than any other technique I've tried for sewing zips. So I decided to document the process and share it with you lovely folk. Now I must say that although Heather showed me how to do this, she originally learnt the technique from here, so huge kudos to the Sew? I Knit! Blog!

Step 1) Cut your fabrics to size. I'm making covers for a 45cm cushion so my pieces are 47cm x 47cm including a 1cm seam allowance. I also overlock the bottom edge of each piece where the zip is going to go.

making cushions - front and back, zipper edge overlocked

Step 2) Prepare your invisible zip! Pictured below are the sort we buy. They're "heavy duty" ones, and you'll see that the bulky teeth side of the zip is the BACK rather than the FRONT like on normal zips. We use a 40cm zip for a 45cm cushion.

making cushions - invisible zips

Now it makes the sewing process a LOT easier if you iron the zip out flat before you begin. Open the zip completely and see that you can kind of 'roll' the teeth outwards to expose some tiny stitches beneath. Iron the zipper with the teeth rolled outwards as shown below, and just go as close to the zipper head as you can. Use a low heat setting so as not to melt the teeth!

making cushions - iron invisible zip out flat

Step 3) Pin the zip in place. Open the zip right up and lay it along the bottom edge of your fabric. The RIGHT side of your zip should be facing down, with the RIGHT side of your fabric facing up. The zipper tape should be lined up with very edge of the fabric.

Also, you'll notice below that I've positioned the zip to one side, with the closed end starting right in the corner. I'll explain this later.

making cushions - pin zip in place

Step 4) Prepare your invisible zipper foot. Okay these are often very weird plasticcy contraptions, but they're not expensive and you can get them from most sewing places. There's generic ones that come with various attachments so you can fit them on any machine. YOU MUST USE AN INVISIBLE ZIPPER FOOT. Trying to sew an invisible zipper without one would be very tricky indeed.

making cushions - invisible zipper foot

Step 5) Sew your zip in place. You'll see that the invisible zipper foot has two grooves in it's base. Your folded out zipper teeth will fit in one of these grooves whilst the needle stitches very closely beside the teeth. You'll probably need to adjust the position of the foot or the needle to get a nice close stitch. Begin sewing where the zipper teeth start and stitch towards the zipper head. Keep the teeth folded out flat as you go.

making cushions - sewing invisible zip

Sew along the length of the zip, removing pins as you go, until you reach the zipper head. You'll probably get to about 1cm away from the zipper head before you have to stop. That's fine. Just do a locking stitch and raise the foot. You're done with that side!

making cushions - sewing invisible zip (front side)

Step 6) Sew the other side. Repeat steps 3-5 for the other side. Be careful to pin the correct side of your zip to the correct side of your fabric:

making cushions - pin zip in place

Sew along the length of the zip as you did before, this time with the teeth of the zipper in the OPPOSITE groove to the one you used before. Sew until you reach the zipper head and stop, do a locking stitch and raise the foot.

making cushions - sewing invisible zip  (back side)

Step 7) Finish off the ends of your zip. If you close your zip completely (ooh it's so neatly concealed!) you'll see that the head and tail of the zip are still exposed. Like this:
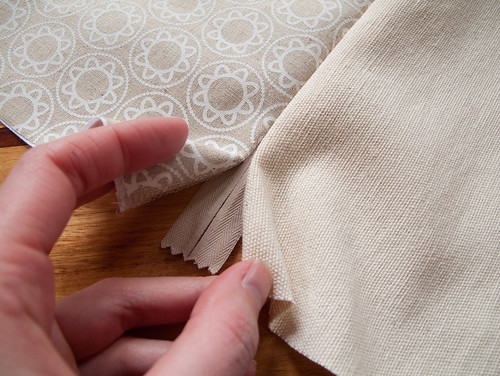
making cushions - zip fitted, ends need to be closed off

And this:

making cushions - zip fitted, ends need to be closed off

But to close these ends off is quite simple. Lay your fabrics together again right sides facing. You'll see where your zip stitching ends - a few centimeters from each side of your cushion.

Attach a normal zipper foot to your machine with the needle to the right of the foot. Sew in from the side of your fabric and try and get as close as possible to your existing stitches. Hold the ziper tail out of the way so it doesn't get caught in your stitches.

making cushions - closing off the ends of the zip

Do the same at the other end. When working the open end of the zip, make sure that your fabric & stitches are lined up correctly, and move the zipper head along a bit so it's not in your way.

Step 8) Admire your handiwork so far.
Doesn't it look all neat and tidy? Wasn't that so much less painful than you expected? Also notice that your zipper ends up being more or less centered because of how we offset it's position in the first place.

making cushions - invisible zip fitted

Step 9) Finish it off! Finishing the cushion from this point is a simple affair. Simply lay the cushion front & back fabrics together right sides facing and stitch around the remaining three sides. Make sure you open the zip first before doing so! Then overlock the edges if desired.

making cushions - ready to stitch up the sides and overlock

Et voila! Here's the ones I just made for our home:

finished cushions
Cushion with Rooftops and Delft

finished cushions
New cushions hanging out on the couch. Featuring Delft, Rooftops & Birch prints.